My name is Nick Harmon, and I am the developer and owner of Fresco Harmony. Fresco Harmony
is America’s first color line designed specifically for drywall joint compound, or “mud,” as it is
commonly referred to. As Fresco Harmony continues to grow in popularity, I get more questions
about what Fresco Harmony is, and how it came to be. I’ll try to keep this article brief, but I think
it’s a great story anyway — so here goes.
I began my drywall career in Longview, Washington, at ‘Fleetwood Manufactured Homes of
America’ in the Drywall Department. There was something about the mud that caused me to be
attracted to it right away. It was a challenging medium to work with, and I loved the texture and
feel of it. I also liked working with my hands and liked working in the construction industry in
general.
I received my preliminary drywall education at Fleetwood, but the pay at Fleetwood wasn’t great
and I’d heard a Drywall Finisher could make more by becoming a Journeyman in the Union, so
after a year and a half at Fleetwood, I quit and began my apprenticeship with the Local 360 out of
Vancouver, Washington. When I started working in the Union, most of the work we were doing
was in Portland, Oregon. I started out at 50% Journeyman wages. Full journeyman scale at that
time was $25.80 per hour, after only 3 years in the field. Also, all apprentices were required to
attend drywall class once a week. Our pay increases were based on time-in-the-field and our
attendance in the classes. While in the field, I got picked on a lot by the Journeymen and Foreman.
They were a real roughneck crowd, but I didn’t mind. I liked the work. My early training consisted
of carrying scaffold, mixing mud, and cleaning the automatic tools. If I were lucky, I’d get to spot
screws and spin outlet covers for the day. Working on the job is where I gathered most of my
knowledge about the drywall industry, but it was in the classes that I first learned about color.
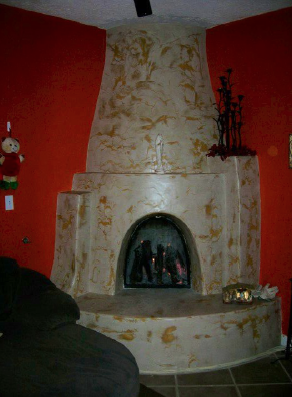
There were a couple of classes in particular that stood out as pivotal for me. On one occasion, the
instructor showed us this great technique where if one rolled Elmer’s glue on the surface before the
mud, it would crack and slide giving the surface an Old World cracked feel (pic 1).
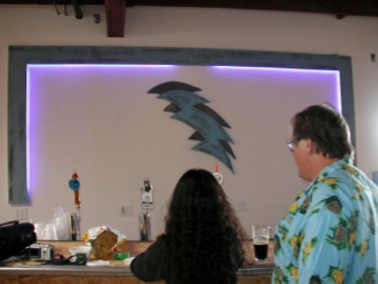
The other class that stood out was one in which the instructor introduced colorants and various
types of plasters to the class. Everyone was to mix up a batch of colored plaster and start creating. I
thought it was the coolest thing I’d ever seen! I immediately created a sunset mural using some
color and regular mud (pic 2). I was hooked. Having an artistic nature to begin with, it wasn’t
difficult for me to see the value in this amazing new discovery. I called it “Drywall Art” because the
canvas we were working on was a 4 x 4 chunk of drywall. In the second photo, we cut out 1/2″ of
the existing studs and inset the piece right into the wall. The Apprentice Painter Instructor
borrowed one of the pieces I’d made to demonstrate how to apply a water based sealer over these
textural surfaces. The sealer worked beautifully with the colored mud and “Colored Joint
Compound Art” was born. After that, I began creating lots of hanging wall art in this fashion. Every
class thereafter, I’d head straight for the color locker and start creating. Everyone had his eye on
what I was up to, including the instructor. Finally, after several classes, the instructor locked up the
colors and said I couldn’t work with them any more. The next day I went out and bought my own
colors and started working out of my garage.

Several months passed this way (by working and doing my own art), and I was moving up the ranks
in the Union quickly. In only a year and a half, I was earning 70% Journeyman wage, with full
benefits and vacation pay. I’d saved enough vacation pay that I decided to take a small break and
head south. I traveled down to Bisbee, Arizona (an old mining town) to visit my brother, who was
living there at the time. I found that the Southwest and warmer weather suited me, so I decided to
throw cosh to the wind, move to Bisbee, and reinvent myself as an artist.
I got a job a half-hour outside of Bisbee, in Sierra Vista, Arizona for a company called, “Sun
Drywall.” I went from making $18.50 per-hour, with full benefits to working piece rate at $.08-
per-foot to finish. I’d had enough experience with the automatic tools that I could wrestle through
what I didn’t know, and make up the rest.
Working on an easy house, I could make $12.00 per hour. That wasn’t great, but at least I was in
the sun and still able to create art everyday. Needless to say, I became very fast at running the tools.
After a short while, I could finish a small house all by myself in only 5 days. I acquired a helper for
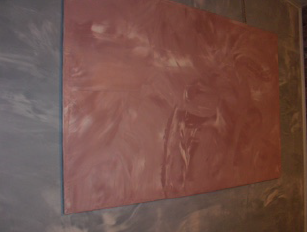
awhile, but he was slow and I found that I liked working alone. At that time, I also began
experimenting with structural designs, incorporating corner beads, and utilizing colored mud (pic
3). This is an early example of what Trim-Tex calls, “Drywall Art” today. You can imagine my
excitement when I discovered there was a whole movement around this sort of thing with new
trims and special corner beads!
Around 2001, I was shown in my first Art Show in Bisbee, showcasing one of my early mud art
pieces, “The Monkey.” (pic 4). I continued to explore color and mud art in Bisbee until I got the
opportunity to take a job up in Crested Butte, Colorado with a company called C.B. Drywall. It
was the summer of 2002, and the high mountain lifestyle resonated with me, so once again, I
packed up my things and moved. My first summer in Colorado, I was introduced to a texturing
method that would lead to the base coat of Fresco Harmony, the company I later started. They
were calling it “The Adobe Texture,” but basically, we were using a hawk-and-pool trowel to
create a heavy, full wall texture, with very little movement. It was a great texture method, too,
because it covered the entire surface, and we only had to tape and glaze the angles once. It also
reduced sanding considerably so I was totally on board. We did lots of skip trowel too, but the
Adobe texture was the preferred texture by most of the GC’s we worked with. The contractors
appreciated that it looked a lot like smooth finish, but was still easy to patch.

This is where the story gets good. On one particular project, one of the GC’s we worked with, Jack
Huckins, called a company out of Phoenix, Arizona called, “Hopper Finishes,” to run a traditional
Venetian Plaster on a “ski-in, ski-out”, 12,000 foot, custom home at the base of the mountain. My
boss was wise to keep me away, since I was very curious about what these guys were up to, and
they weren’t offering up any of their secrets.
In case you’re interested, Hopper Finishes Company offers a class out of Phoenix in learning how to
achieve that look. I believe it’s 1,000.00.
Their guys were cautious to keep the secrets hidden but I still managed to wriggle my way onto the
project and observe the application for myself. Like most aspects of the drywall trade which I
viewed, the plaster process was something I could easily do. My boss had the same idea and we
were all like quiet mice in the corner absorbing as much of the methodology as we could. The
biggest thing that intrigued me about the plaster was the high cost. I was blown away to find that
these guys were getting $12.00- per-square-foot for the finish. That is 10-12 times as much as
drywall finishers usually make, and I’ll say this: there is nothing easy about learning how to finish
drywall.
From hang to finish, drywall a complex system that you are either good at, or you’re not!
Contractors who claim to know how to do drywall are usually the worst. Sure, most of the
Drywallers you meet are or were derelicts (myself included), but that still doesn’t mean there’s
anything easy about the trade. A smart GC, who cares about quality, will always sub-out to a
drywall company. Drywall Finishing is one of the most difficult things I’ve had the privilege to
learn, and I knew right away that I could learn how to achieve that plaster look, not only with
plaster, but with something more efficient, and cost effective, than what these guys were using. It
was like something just clicked.
After Hopper Finishes had wrapped up their scope of work, Jack Huckins liked the Venetian Plaster
so much that he wanted the downstairs finished the same way. This time it was CB Drywalls turn.
We completed the downstairs and it looked as good as the upstairs, but I couldn’t believe how labor
intensive it was. I began using my 6″ pallet knife to run tricky areas, but what was really coming
into focus was that I kept envisioning how I could achieve a similar look with drywall mud. I didn’t
know how yet, but I knew it could be done and my mind kept drifting back to that Adobe texture
we were doing. The seed was planted.
After that winter I had the opportunity to help a friend with a remodel he was doing up in Portland,
Oregon. We worked on that project the entire summer. As luck would have it, toward the end of
the summer, my truck broke down and I was stuck at my friend Chucks house with little work and
no way to repay him. He suggested doing something about the old wood paneling on his walls and I
told him I had an idea. Chuck was pretty savvy with construction, so I offered my plan. “Instead of
ripping out the paneling, or hanging over it, let’s just run some colored mud over the existing
surface and seal it,” I proposed. Chuck was hesitant, but allowed me the hallway to experiment. I
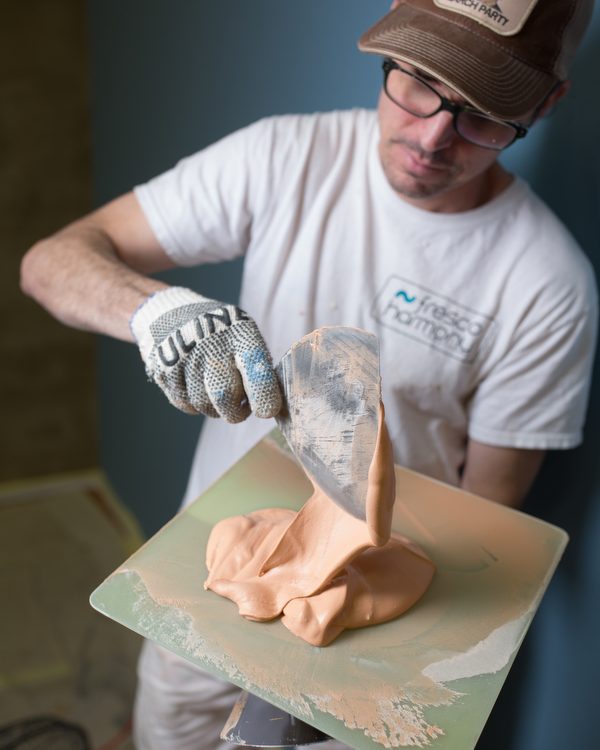
immediately added some black color to a bucket of mud and had another bucket ready with no
color in it. I swirled the two colors together and Fresco Harmony was born! (Pic5).
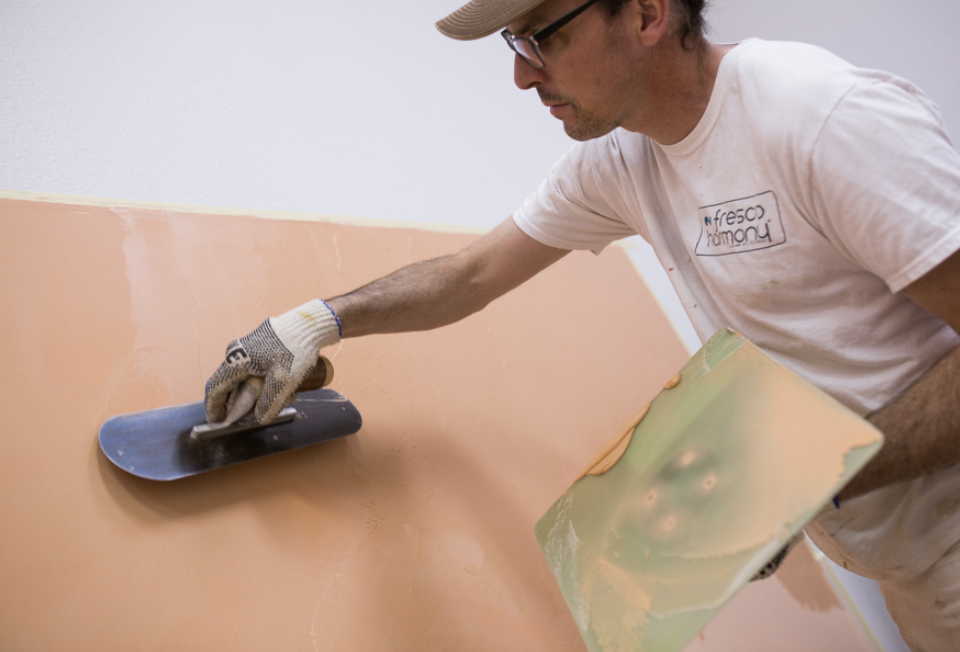
At that time, I used the same water based acrylic varnish I’d learned of from the painting union
guys. Using that varnish, coupled with a round-edge-tile sponge (a method I’d picked up from
watching the Hopper Finishes guys), we created a pretty cool-looking wall. Chuck liked the finish
so much he had me do his entire living room and kitchen. I thought I’d invented the light bulb! I
knew right then that this was my calling and I had to bring it to the world.
By the time I left the PNW, I had a working truck, and I was armed with an idea that was sure to
change the world. When I got back to Crested Butte, I began making samples to show some of the
contractors, but they weren’t biting. They felt the idea was still too green for use, and it was! There
was still so much that I needed to research before this could become a viable surface option.
Fortunately, I was able to get a couple of random homeowners on board with the idea and, after a
couple of projects, I discovered one immediate problem I’d need to solve if I were to continue
moving forward with the idea. It had to do with color consistency. With the plaster we were using,
we’d have to batch up quantities of product for individual sections, while being mindful of break
lines. I assumed, early on, that I needed to do that with joint compound too, but that wasn’t the
case. With mud, if measured correctly, I found that the color from batch to batch was amazingly
similar. I discovered that there are many reasons why color consistency is an important element.
Here are a few reasons:
First: If you’re doing a large room, it’s important to have consistent color so if you run out of
product in the middle of a wall, you can’t see a distinguishable break line. It’s time effective to be
able to use multiple batches while working a large area. With plaster it’s nearly impossible and
extremely time consuming.
Second: In communicating color, it’s important that potential clients know exactly what they’re
getting. If I show them a sample, it’s very important that their wall will receive exactly what is on
the sample.
Third: If you ever have to do a patch in a home, or if they want more of the same color, that color
needs to be exactly the same.
These are a few reasons why I needed an accurate color-measuring system early on, but I still had
no clue how to do it. I began keeping a log of colors that I had created based on a box of joint
compound, and slowly, as my catalog grew, so did my pallet. I also created several samples, which
helped tremendously. Color was important, but it paled in comparison to the challenge of creating
a seamless system that was fast and easy. At first, I figured I’d just paint and texture the wall at the
same time: simple, I thought! However, when dealing with spreadable mediums, there is really no
absolute simple way to do it. Fresco Harmony is faster and easier than anything currently on the
market; that part is true, but there’s nothing easy about it.
At first, when I was going over textural surfaces, I felt I had to skim out the wall with quickset,
prior to applying the color. I’d do what I called, “racing stripes.” With my 14″ knife, I’d skim out
strips lengthwise on the wall. Then I’d let those dry, and go in between those lines, with the same
method. This flattened the wall, but it was labor-intensive. After a year or so, I realized that instead
of prepping the textural surface first, I could just combine that step with the Adobe texture, into
what is now the FH base coat. It’s the glue in the all-purpose that allows it to stick to pretty much
anything.
Another aspect of developing the Fresco Harmony method was creating the simplicity of the second
coat. I assumed that in order to achieve color variation on the surface, I needed to swirl two colors
or layer two different colors – but that wasn’t the case. What I realized is that between the first coat
and the second coat, I could achieve color variation with the same color based on the thickness of
the mud, and various application techniques. This discovery further cut down on time-consuming
and labor-intensive steps.
My last challenge was trying to figure out the sealer. Two years into the concept, I was still using
two coats of the water-based varnish. It was good, but not great. I wanted a surface that was strong
enough that one could wipe off wine or coffee. Finally, a friend in the trade suggested something
called “Modern Masters Venetian Topcoat.” It worked like a champ, so I used this two-coat sealer
method for 5 years. In doing the first seal coat, I’d use the water-based varnish, and applying the
second seal coat, I’d use the Venetian Topcoat. This combination was working well, but in the back
of my mind, I knew the Venetian Topcoat could stand alone. I wanted to get the system down to
just three coats, no matter what. I started doing experiments, and after a short period of time, I
divorced the Varnish altogether from the system and the FH three-coat-system was born. It didn’t
really matter what substrate I was going over. With this three coat system we could achieve a
beautiful look. (Pic 6)
By this point, I was living in Albuquerque and keeping pretty busy just doing colored mud. To date,
Fresco Harmony Services LLC has covered and colored more than 800,000 square feet of surface
area. I had always wanted to share this idea with other drywall finishers but was afraid they’d steal it
and exploit the research I did and the method that took me so long to create. I spent a lot of money
and energy on patent protection, but in the end, I realized that ,this market is new. A large part of
what I’m doing today is educating professionals on what exactly it is that we do, and how drywall
professionals can create huge profit margins, incorporating upscales into their existing systems. The
Color Pack allows me to share the idea, but it’s merely the beginning of something larger.
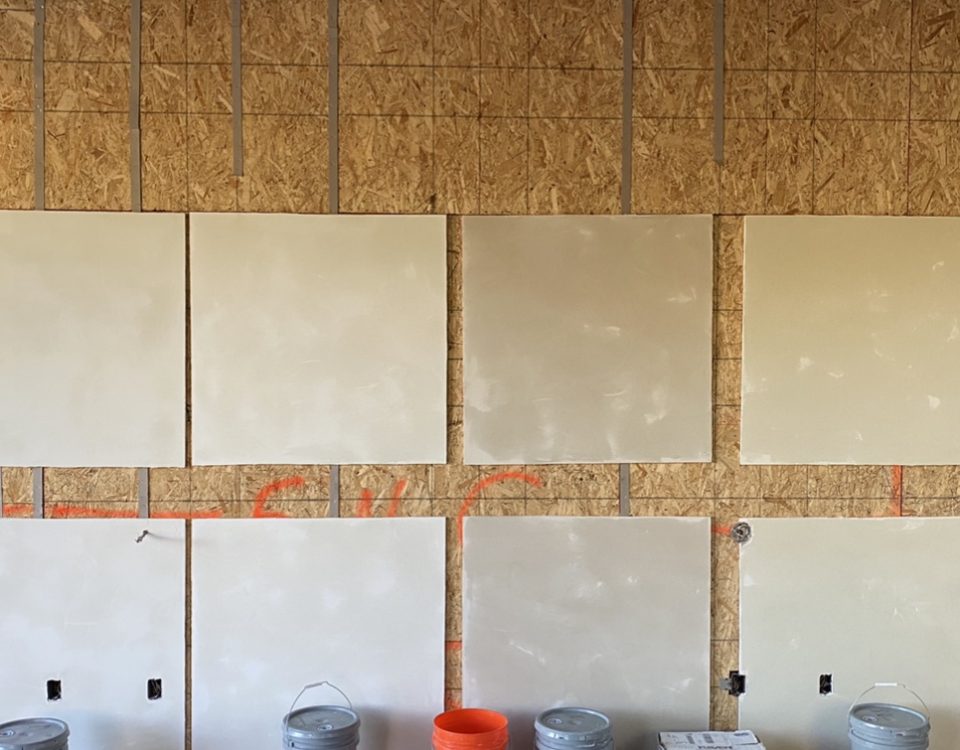
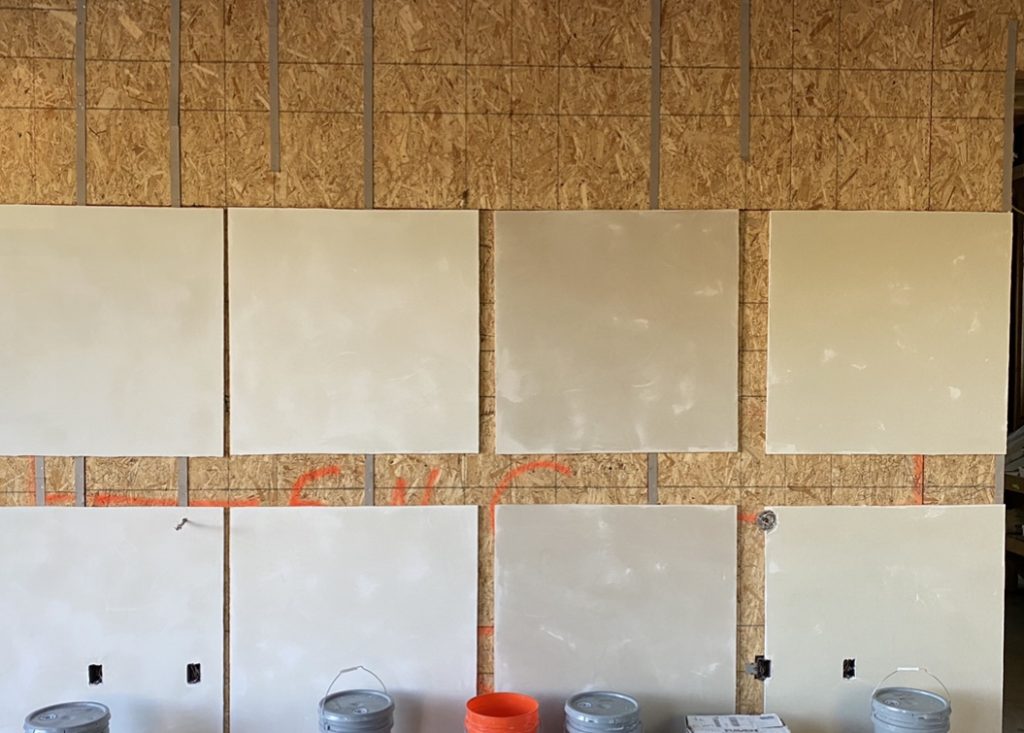
Recently, we’ve completed several new construction homes by using the Fresco Harmony system
and are achieving amazing results. This year we completed two full houses with the Hang, Finish,
and Fresco Harmony systems. We even incorporated specialized Trim-Tex corner beads and still
achieved four times the profit margin compared to just finishing and texturing the drywall.
Joe Koenig said it best…
“Stay in the house longer and make more money off each house.” (Joe Koenig – owner,Trim-Tex).
Our Fresco Harmony Services Team uses the same Color Packs and system we sell to our clients.
Our color line is comprised of beautiful, original colors that clients and designers have chosen over
the last ten years. We’re working everyday to create the most simple,beautiful, yet cost efficient
systems to achieve beautiful walls in new homes as well as existing textured houses. I’d like to see
the drywall industry begin to turn these new concepts into more dynamic sales. Let’s continue
utilizing the skills, talent, and tools that we are already using to generate real profit margins and
change the way Drywall is done and viewed in construction. There are no wall systems currently
on the market that are as easy to use, cost effective, and as beautiful as the Fresco Harmony system.
Private message me about how you can get your free Color Pack and Color Chart, and let’s see how
we can start recreating your business with Fresco Harmony today!
2 Comments
Nick, can your product be used just to color the mud ? I would like to paint my smooth wall one color then texture over the painted wall with your product in the mud. I have done this before adding paint to the mud to achieve the desired color. But like you said it is hard to achieve the same color/consistency from batch to batch. Any experience you may have would help.
Yes, the product is specially made for mud.